Showing posts with label ubuntu. Show all posts

Friday, October 26, 2012

Getting Started with node.js on Ubuntu

This is a small getting started guide for getting up and running with node.js on Ubunutu.

Step 0: DON'T install node.js from Ubuntu Software Center.
When I started messing about with node.js the first thing I did was to install node.js from Ubuntu Software Center. But soon I started using it I realised that some of the stuff that my friends where using, like npm ( more on that later ) was missing. I check the version and realised that the version I got from UBC was 0.2.6 while the latest verision was 0.8.12. So i quickly removed it from UBC and headed online.

Step 1: Install from nodejs.org  
Head to http://nodejs.org
Clicking the "Install" link will give you the latest version tar.gz
Extract the content to somewhere good, this example i will use ~/code/
Enter your terminal and go to the folder, cd ~/code/node-v0.8.12
Read through README.md carefully ( lol! )
>./configure
stuff happen
>make
more stuff happen
>sudo make install

Restart your terminal


Step 2: Start Server
Copy the following code to a file called node_js_getting_started.js
var http = require('http');
http.createServer(function (req, res) {
  res.writeHead(200, {'Content-Type': 'text/plain'});
  res.end('Running node.js\n');
}).listen(1234, '127.0.0.1');
console.log('Server running at http://127.0.0.1:1234/');
Or download the file here node_js_getting_started.js

Now run the command >node node_js_getting_started.js
And you should see
Server running at http://127.0.0.1:1234/

Step 3: Test it
Open a browser and go to http://127.0.0.1:1234/
and now you should see "Running node.js" in your browser.
We got a webserver with node.js up and running! Yay!


Saturday, October 8, 2011

Ubuntu 11.04 Freeze On Startup using Current Nvidia Drivers

Yesterday coming home from a night of dining and board games I decided to update my Nvidia drivers. The reason I wanted to do this was because I just bought the Humble Frozen Synapse bundle and it was running slow on my machine, I thought that updating the Drivers would give me some sweet Hardware acceleration and kung fu graphics.

But instead of Gaming Heaven I entered Linux Hell.

After selecting "NVIDIA accelerated graphics driver (version current) Recommended" and rebooting I couldn't use my computer any more. Ubuntu and Unity would start. I was able to move the mouse but rest of the desktop was frozen. It was like it had frozen in mid launching.

I figured that changing back to the old driver would fix it. Likely by entering some kind of Graphics Safe Mode. But how to do this without a GUI was a not obvious to me.

This is the long version of how I fixed it. I have included some, but not all, of my trial and error. I am writing this both for my sake, otherwise I am likely to forget how it was fixed, and for your sake, hoping to help someone with similar problems.

Part 1: Grub
Since I only have one OS on my computer Grub was configured to not show a menu on start up. So first I needed to figure out how to enter Grub on boot. Holding down SHIFT like it said in the documentation didn't work so I after I while I figured out that if I pressed "Ctrl+Alt+Del" and held for a few seconds it would reboot and Grub menu would show up. Doing this all the time was annoying so I decided to enable Grub on boot.

Step by Step instructions:
* Reboot and hold "Ctrl+Alt+Del" to enter Grub.
* Select Recovery mode of latest kernel
* Select "Drop To Root Shell Prompt"
(Root shell did not ask for password which was kind of scary)
* Edit file /etc/default/grub

I changed "GRUB_HIDDEN_TIMEOUT=0" to "GRUB_HIDDEN_TIMEOUT="
This, according to Grub Documentation, means
- The menu will be displayed for the number of seconds designated by GRUB_TIMEOUT.

I changed "GRUB_HIDDEN_TIMEOUT_QUIET=true" to "GRUB_HIDDEN_TIMEOUT_QUIET=false"
This, according to Grub Documentation, means
- A counter will display on a blank screen for the duration of the GRUB_HIDDEN_TIMEOUT value.

* Restarting Computer
Now Grub menu is shown by default. Yay!

Part 2: Disable auto-login
Since I'm the only user on the system Ubuntu has been set up to Auto-Login with my User. I needed to turn this off since I figured I could select Safe Mode from login screen. I couldn't enter the system since it freezes so I needed to do this from the command prompt.

Step by Step instructions:
* Reboot to enter Grub.
* Select Recovery mode of latest kernel
* Select "Drop To Root Shell Prompt"
* Edit file /etc/gdm/custom.conf

I changed "AutomaticLoginEnable=false" to "AutomaticLoginEnable=true"

* Restart Computer, select latest Linux in Grub
Now I have a login screen instead of a Unity that hangs. Yay!

Part 3: Login Safe Mode
When login screen appears I stopped the timed login and selected my user.
At the bottom of the screen there is bar where you can choose window manager.
I selected "Ubuntu Classic" which means Gnome, and enter Ubuntu.
Won't Start! Same as in Unity, freezes Desktop but I can move the mouse. Damn!

* Restart and try again
This time I select "Ubuntu Safe Mode" and enter Ubuntu.
It starts and I can use my computer again!
I'm so close to victory that I can taste it.

Part 4: Disable nvidia-current
* From Gnome menu I select "System" -> "Administration" -> "Additional Drivers" and try to enable the old Nvidia drivers but is informed that I do not have permissions to do such a thing.
* Using "System" -> "Preferences" -> "Main Menu" I find out the command to start "Additional Drivers" which is "/usr/bin/jockey-gtk".
* Start terminal and enter "sudo /usr/bin/jockey-gtk"
* Dialogue opens and I can enable the old Nvidia drivers.
* Restart Computer and Select "Ubuntu" on login screen.
Now Unity starts without freezing!

After a few hours of fighting with Linux I am finally back to where I started.
Frozen Synapse still has bad FPS and lagging but I so much better than a Computer that freezes.

Have a great weekend!

Saturday, January 8, 2011

Getting Amiga 500 game Demon's Winter running on Ubuntu

This is a step by step instruction on how to get the Amiga 500 game Demon's Winter running on Ubuntu 10.10.

It's highly probable that these instructions will get most Amiga games running on most versions of Ubuntu/Linux. At the very least it'll give you an understanding of the steps to take to get emulating Amiga to work.

Step 0: What is Demon's Winter?
Demon's Winter is a role-playing game released in 1988 for the Amiga by Moby Games. A friend told me about it so I decided to try and get it up and running on my Linux Desktop. If you want to know more check out the following pages
http://en.wikipedia.org/wiki/Demon's_Winter
http://www99.epinions.com/game-review-F1F-5744459-3A290AB3-prod1

Step 1: Download Demon's Winter rom
Amiga roms are called .adf ( Amiga Disk File ) and you need it to play the game naturally.
Download zipped Demon's Winter rom from link belown and unzip it somewhere.
http://www.emuparadise.org/Amiga_ROMs/Demon's_Winter/5958

Step 2: Download Amiga Kickstart Rom 1.3
To start the game you need to emulate the Amiga OS, for this you need a Kickstart Rom. In case of the Amiga 500 you need a 1.3 kickstart rom. You can create your own if you own the original amiga disks but it's probably also legal to download it if you do.
Asuming you do own a copy, download these zipped roms from pirate bay and unzip "Amiga kick13.rom" somewhere.
http://thepiratebay.org/torrent/4021764/Amiga_Kickstart_Rom_1.3__2.0_and_3.1

Step 3: Install Amiga Emulator E-UAE
In the "Ubuntu Software Center" search for "Amiga Emulator" and install "E-UAE".

Step 4: Start Game!
Start E-UAE
Select the "Memory" tab. Change Kickstart ROM file and select "Amiga kick13.rom"
Change to "Floppy disks" tab. For DF0, click "insert" and select "Demon's Winter.adf"
Change to "Game ports" tab. I'm using Mouse for Port 0 and Numeric Pad for Port 1 and that seems to be working fine.
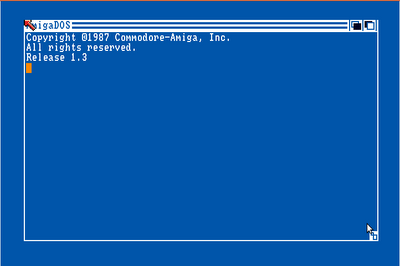
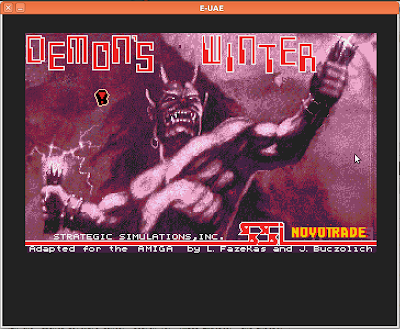
Click start, after a while the Amiga loading screen should should up. Wait for a few seconds and Demon's Winter starts.

Enjoy the game!


Saturday, October 16, 2010

Getting started with Ngix and Strophe.js on Ubuntu

In this post I will get you started on Nginx and Strophe.js
If you missed it, check out my post on Getting started with Ejabberd, it's a precondition to get the stuff in this post going.

I am doing this on Ubuntu 10.04, but I am sure you'll get this running on any Linux flavor.
Lets get started!

Installing Nginx
>sudo apt-get install nginx

Change port on Nginx
I am using port 80 for something else so I will change the port to 8080, this port will be used in all subsequent examples. And you should check the root directory, on some systems it's /var/www, but on mine it was /var/www/nginx-default so that's what I'll use in the rest of this example.
>sudo nano /etc/nginx/sites-available/default
server {
listen 8080 default;
server_name localhost;
...
location / {
root /var/www/nginx-default;
index index.html index.htm;
}


Reload Nginx
sudo nginx -s reload
-s is for signal
Note: On some systems, e.g. Kubunut 10.10, nginx does not start by default. In that case you can start it with >sudo nginx

Check that it works
Point your webbrowser to http://localhost:8080/
You now get a message saying Welcome to nginx!
Yay! It works

Download Strophe.js
Download Strophe.js from http://code.stanziq.com/strophe/
Unzip Strophe somewhere
>unzip strophejs-1.0.1.zip -d ~
Create a Symlink from the root web directory to the folder
>sudo ln -s ~/strophejs-1.0.1

Check that you can reach the page
Go to http://localhost:8080/strophejs-1.0.1/examples/echobot.html
You should now see a page with a simple page with a two field form.

Lets try it out!
Enter form
JID: jonas@localhost
Password: jonas
And click "connect"
Strophe is connecting.
Strophe is disconnecting.

It's not working but we don't expect it to. If you investigate with Firebug you will see that the server is trying to connect with BOSH to http://localhost:8080/xmpp-httpbind and since don't have anything there in our Nginx Web Server the connection fail. What we need to do now is add what is called to proxy_pass to /xmpp-httpbind so it directs the traffic to Ejabbers http-bind page, which we set up in the previous post.

Add xmpp-httpbind redirect Nginx
>sudo nano /etc/nginx/sites-available/default
server {
...
location /xmpp-httpbind {
proxy_pass http://localhost:5280/http-bind;
}
...
}

And reload
>sudo nginx -s reload

Start Echobot
Go to http://localhost:8080/strophejs-1.0.1/examples/echobot.html
Enter same details as above and click "connect".
Now you should get...
Strophe is connecting.
Strophe is connected.
ECHOBOT: Send a message to jonas@localhost/15070348051287336618874524 to talk to me.

Great, almost there.
Use an IM, I use Empathy, to connect to localhost with user jonas2@localhost/jonas2 and then send a message to jonas@localhost. Lets send "Test"
Now in the webpage you should see
ECHOBOT: I got a message from jonas2@localhost/c69ef25a: Test
ECHOBOT: I sent jonas2@localhost/c69ef25a: Test

And in Empathy see
sent jonas2@localhost 19:33: Test
received jonas@localhost 19:33: Test


And now you can see that the echobot webpage works. I hope you have enjoyed these two posts on getting started with Ejabberd, Nginx and Strophe.js, if you have any questions or comments feel free to comment on this post.

See you soon!

Friday, October 15, 2010

Getting started with Ejabberd on Ubuntu

This is a post on getting started on Ejabber on Linux. I am using Ubuntu 10.04 but it should be the same on most linux flavors. This is part of a html5-xmpp project I am doing with a friend. More on that later.

Lets get started!

Install Ejabberd
>sudo apt-get install ejabberd

Give user admin rights
To give user admin rights you need to edit the config file.
>sudo nano /etc/ejabberd/ejabberd.cfg
In the file you need to add a user who will be admin. To confuse matters, I will call this user "admin" and put him on the host "localhost" which is default.
%% Admin user
{acl, admin, {user, "admin", "localhost"}}.

Ctrl-X to Exit and Save

Register User
Ejabber comes with a admin command called ejabberctl, with that you can do the most wonderful things. Lets register the user "admin" on "localhost" with the password "secret"
>sudo ejabberdctl register admin localhost secret

See all registered user
To see all the users on a host run "ejabberdctl registered_users"
>sudo ejabberdctl registered_users localhost
ejabberdctl should now return a simple
admin

Register bunch of users
Lets register two users, we will need them in the next post
>sudo ejabberdctl register jonas localhost jonas
>sudo ejabberdctl register jonas2 localhost jonas2
>sudo ejabberdctl register jonas3 localhost jonas3


Unregister User
This is how you unregister users if you need to do that.
>sudo ejabberdctl unregister jonas3 localhost

Restart Server
Lets restart the server
>sudo ejabberdctl restart

Webadmin
There is a webadmin where you can administer and monitor your ejabber server
Go to http://localhost:5280/admin/
Log in with admin/secret to see all the wonderful stats

Get ready for XMPP


Now that we have the server up and running with a bunch of users, we need to check if it's equipped with http-bind so that we can use BOSH for XMPP communication.

Edit config file
Make sure your config file has http-bind enabled
>sudo nano /etc/ejabberd/ejabberd.cfg
It should look like this:
{5280, ejabberd_http, [
http_bind,
http_poll,
web_admin
]}


And add the http_bind module
{modules,
[
...
{mod_http_bind, []},
...
]}

Lets restart the server
sudo ejabberdctl restart

Verify it on the webpage
Go to http://localhost:5280/http-bind
You should now see a text which reads something like
ejabberd mod_http_bind v1.2
An implementation of XMPP over BOSH (XEP-0206)
This web page is only informative. To use HTTP-Bind you need a Jabber/XMPP client that supports it.


Great, now everything seems to be working. Now check out the next post to get Strophe.js and Nginx up and running!